WINK ERA Alluring Blink Magnetic Eyelashes_WINK ERA
ALLURING BLINK
MAGNETIC EYELASHES_GLAMFIX 글램픽스-Professional Beauty Tool

FOLLOW US ON INSTAGRAM !

WINK ERA - ALLURING BLINK MAGNETIC EYELASHES
WINK ERA Alluring Blink Magnetic Eyelashes
GLAM MY LASH
WINK ERA Alluring Blink Magnetic Eyelashes
$15
Snap & Go with No Mess

Discription

+

Experience effortless glam with WINK ERA  Alluring Blink Magnetic Eyelashes. Featuring 0.17mm micro-magnetic precision for a seamless 24H hold. Crafted with < 0.01g feather-light fibers and Ultra FeatherMag™  for all-day comfort, and designed to be reused up to 300 times for a greener, budget-friendly routine. Waterproof, sweatproof, and coated with rust-resistant epoxy, these lashes stay flawless through it all — and they’re gentle enough for even the most sensitive eyes.

Certification

+
·Vegan-Friendly & Cruelty-Free Statement
· Clean from Toxic Materials Statement
· Factory Satisfaction Test
- 98% 12H long-lasting lashes
- 99% of the customers feel comfortable
- 98% of the customers have their lashes perfectly applied for 12H
- 98% of the customers feel the lashes are waterproof & sweatproof & rust-resistant
- 300 Times Reusable Test

How To Use

+
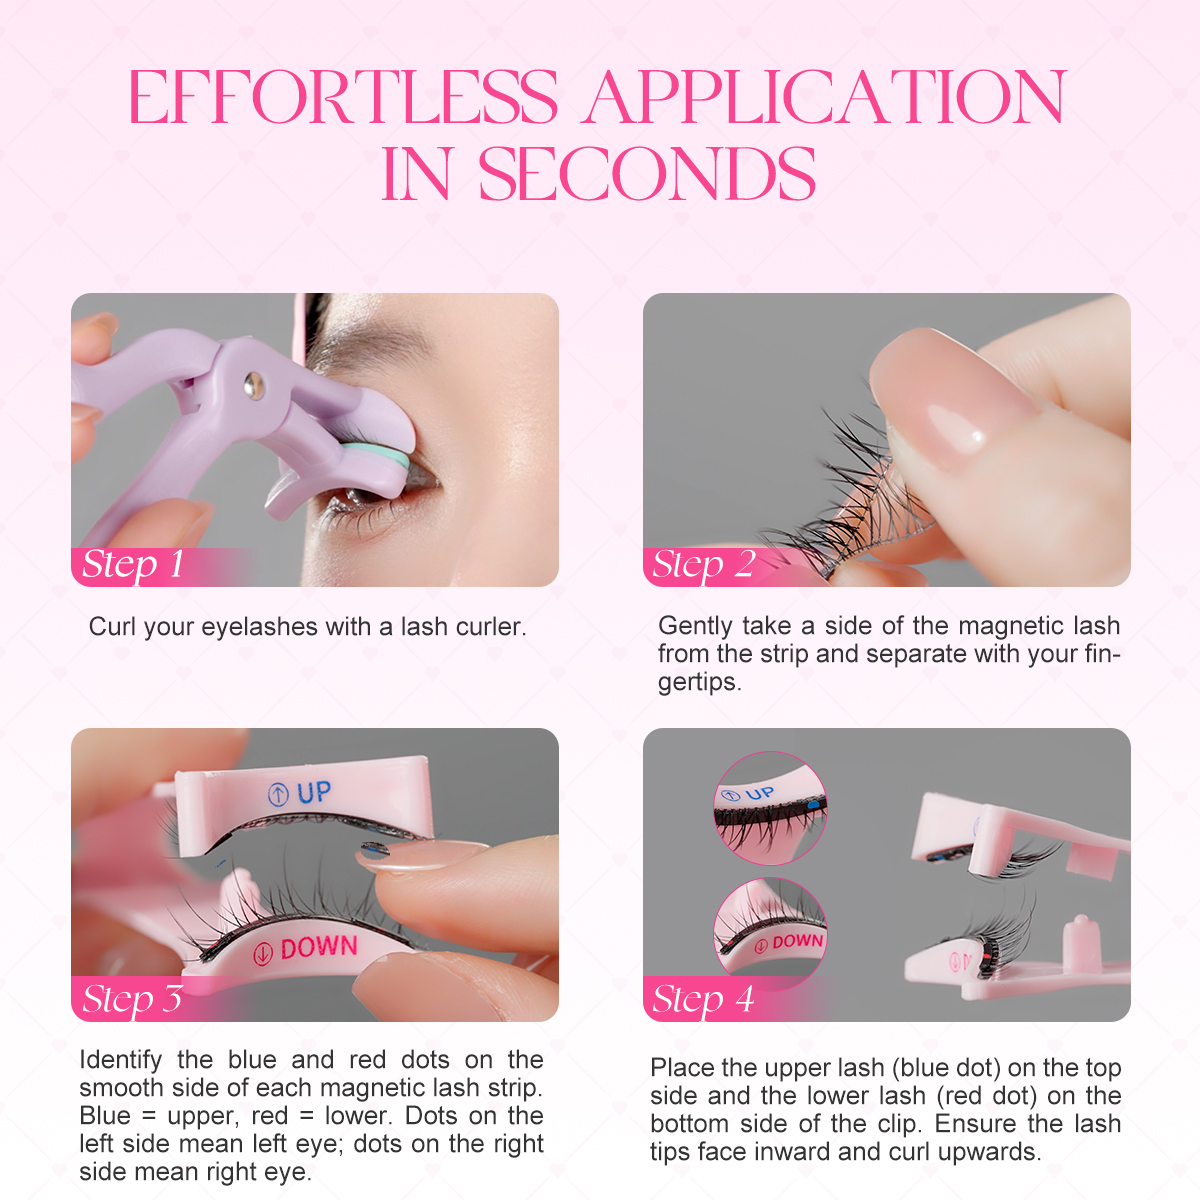
1. Gently curl your eyelashes with a lash curler.
2. Carefully take one of the magnetic lashes from the strip and gently separate the magnetic lashes with fingertips.
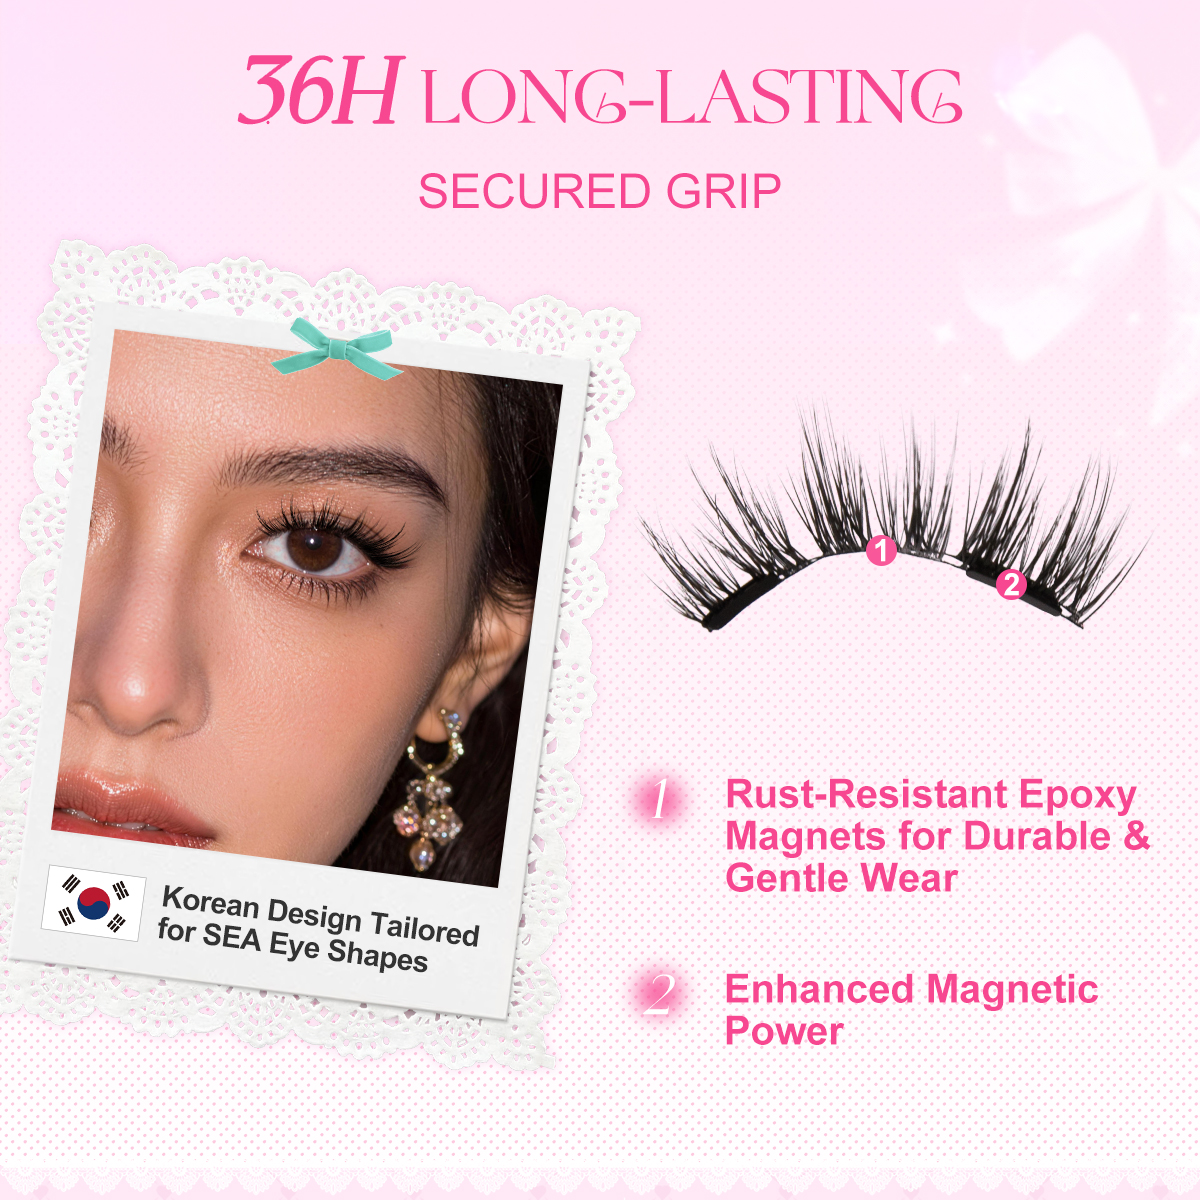
3. Each magnetic lash strip has a smooth side marked with blue and red dots.
- The upper lash piece is printed with a blue dot.
- The lower lash piece is printed with a red dot.
- The dots on the left side of the magnetic strip indicate it is for the left eye, while the dots on the right side indicate it is for the right eye.
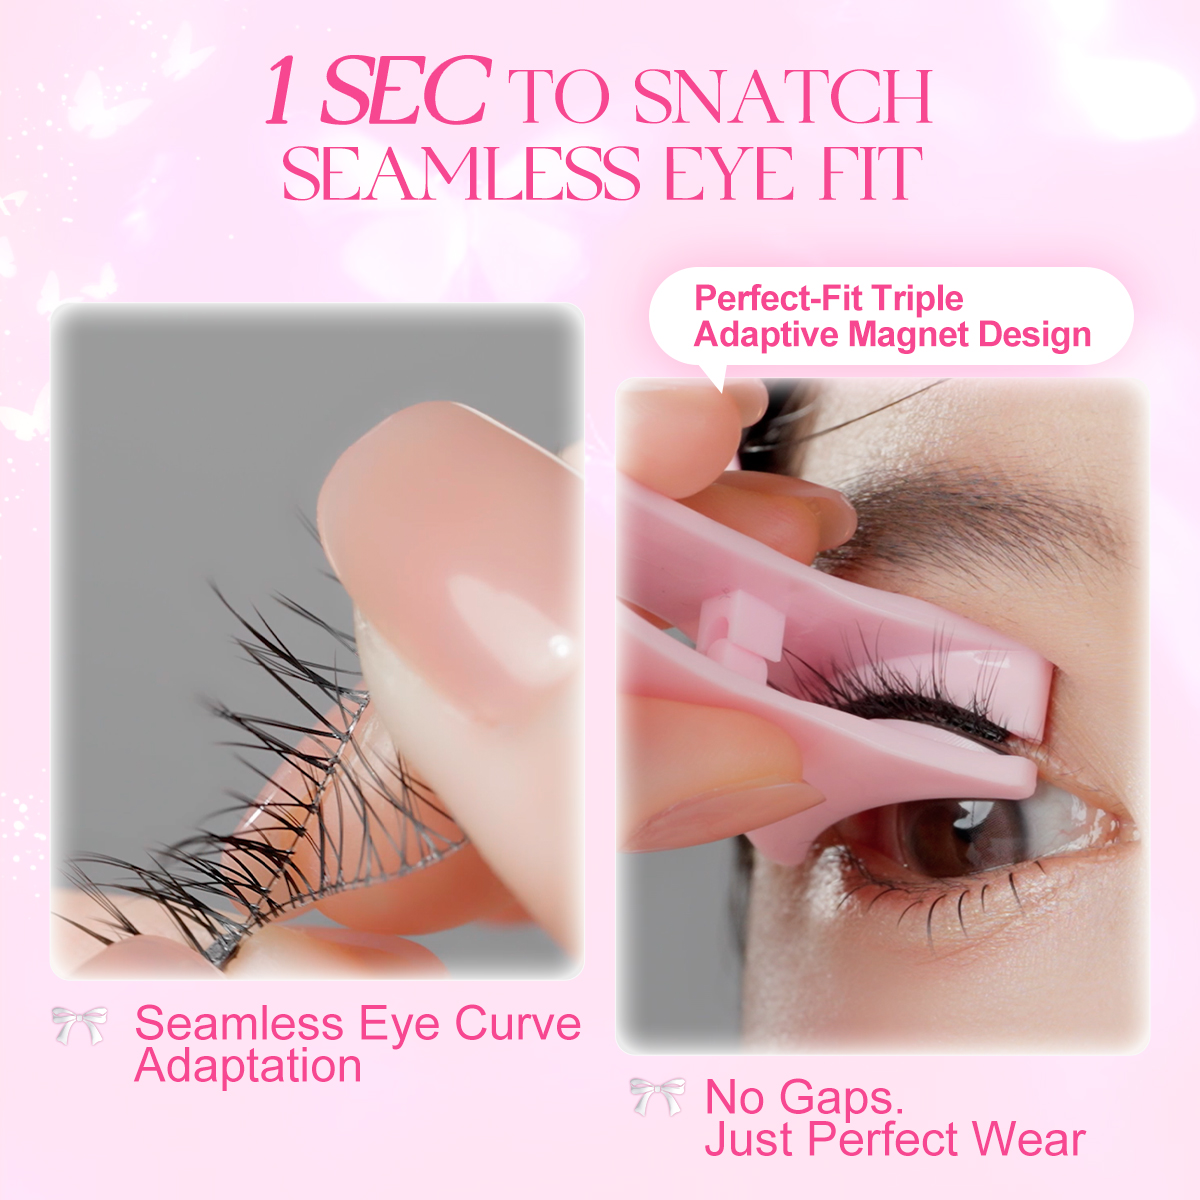
4. Place the the upper lash (blue dot) on the UP side of the auxiliary clip and the lower lash (red dot) on the DOWN side of the auxiliary clip. Make sure the tips of the lashes face the inside of the clip and are curled upwards.
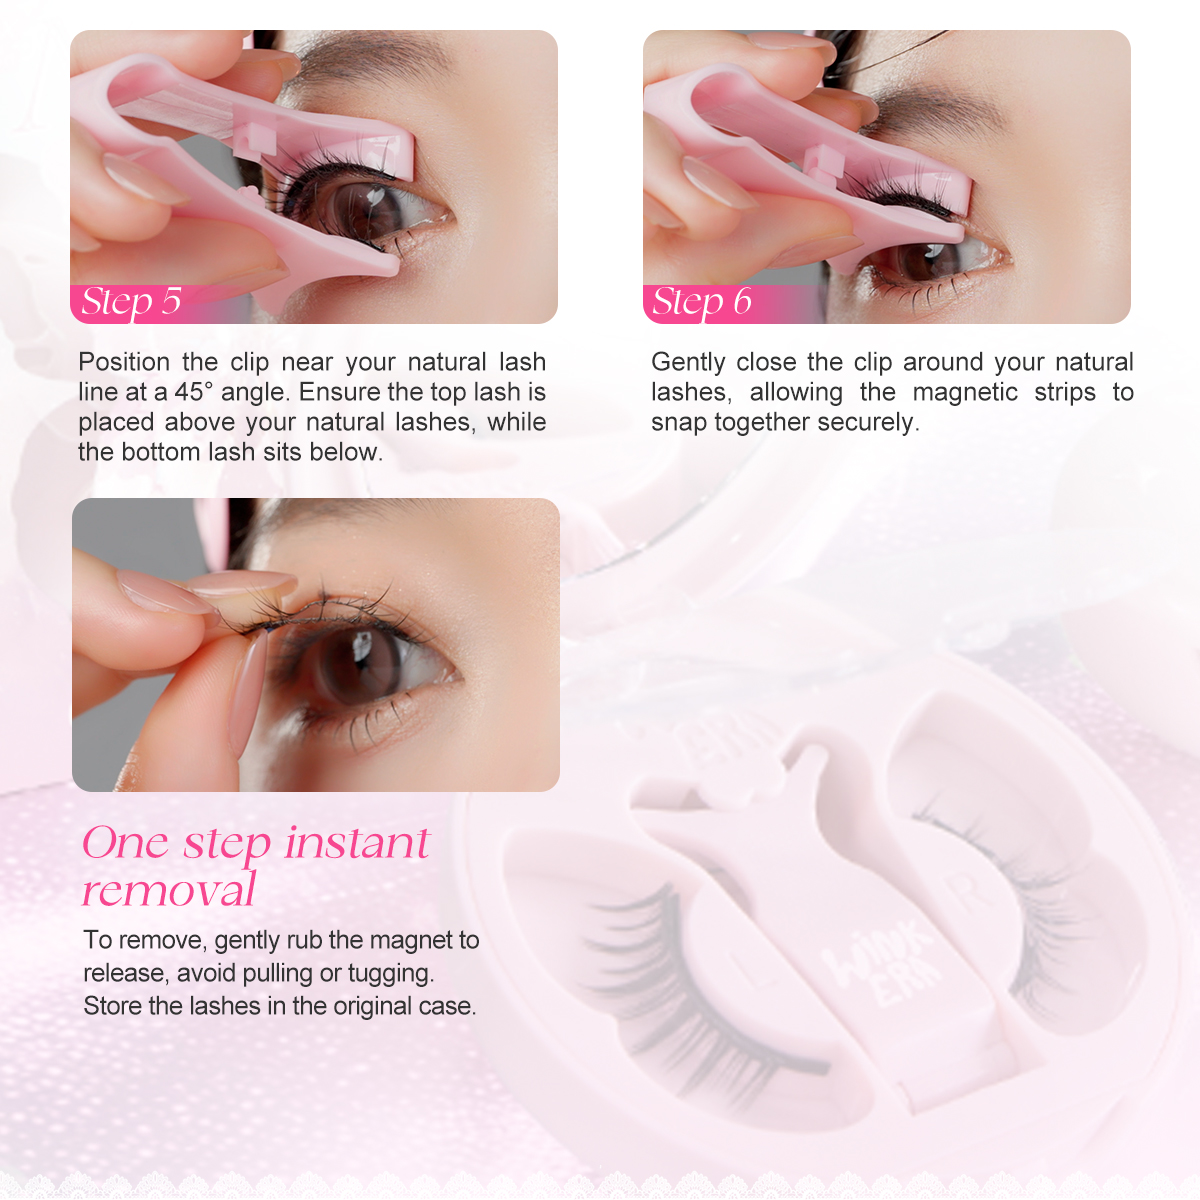
5. Position the clip near your natural lash line at a 45° angle. Ensure the top lash is placed above your natural lashes, while the bottom lash sits below.
6. Gently close the clip around your natural lashes, allowing the magnetic strips to snap together securely.
7. When removing the magnetic lashes, gently rub the magnet to release and carefully pull it away from your natural lashes.
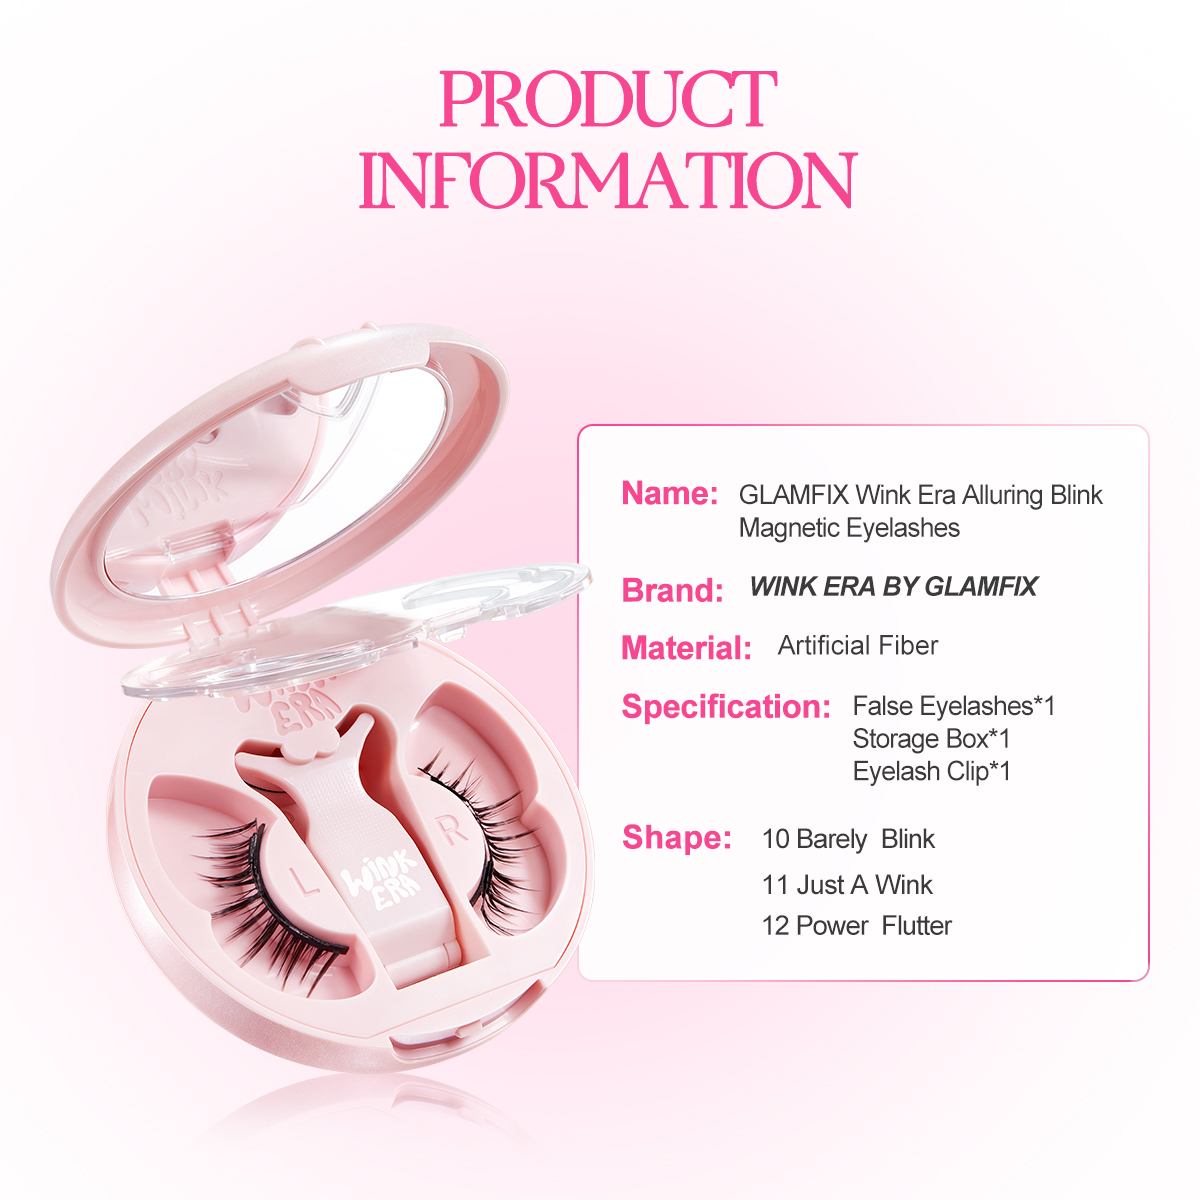
8. Store the lashes in their original case, ensuring the magnetic strips are placed neatly and the lash tips are positioned downwards.

TOP